Showing posts with label nesting components kit. Show all posts

Friday, January 3, 2014

Paper Wings Productions Design Team Blog Hop & Giveaway

WELCOME to the Paper Wing Productions Design Team Blog Hop & Giveaway!  If you've arrived here from Irit's blog, then you're in the right place.  If you’re just stopping by for a visit, please CLICK HERE to start from the beginning.


We have come up with a fun challenge for 2014.  Each month our designers will be given a challenge of creating their projects using a certain color scheme.  This month our theme is White.  It will be so much fun to see how each designer interprets the color.  Go grab your favorite snack, get comfortable and enjoy the hop. 


The main prize is a $25.00 gift certificate to the Paper Wings Productions online store.

For a chance to win all you need to do is:
  • be a follower of the Paper Wings Productions blog
  • visit each of the participating designer's blogs and leave a comment
  • come back and leave us a comment on the PWP blog telling us you completed the hop.
To increase your chances of winning: like our Facebook page and/or invite your friends to the hop.  Be sure to leave a separate comment for each of your additional entries. The winner will be announced on Tuesday, January 7th, 2014 on the Paper Wings Productions blog.

Happy 2014 Everyone!!  I hope you all had a WONDERFUL holiday season.  Our's was great because we actually had all of our sons here with their families.  Now that two of them are grown, it's really hard to get everyone together so we really enjoyed having them.  I also took a lot of time off to enjoy my family and recharge the ole batteries.  It felt great to sit back down at my work table to create.  So without further ado, here is my project!


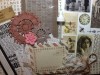
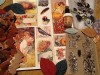
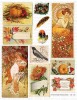
I created a tag using the BEAUTIFUL January Nesting Components kit and several PWP stamps.


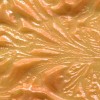
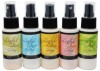
I was really inspired by the Cosmo Cricket wood charms in the Jan kit.  I had a ton of ideas of what to create with them but settled on making a frame with the rainbow arches.  I wanted to give them texture so I applied a layer of crackle paste, then sprayed them with each of the Lindy's Sidekicks but in the end I decided to cover them with white embossing powder.

  
I formed the shape of my frame on balsa wood and outlined to cut out but the balsa wood began to split as I cut so I ended up using matte board instead.


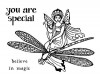
I used the beautiful Diana stamp for my focal image (she's one of my favs).  I stamped her with Stazon and then used Prismacolor pencils and Distress inks to color her.  Once I was done, I fuzzy cut her to insert into my frame.


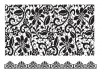
I stamped the matte board with the delicate Lace With Border stamp.  I used Old Paper Distress Ink to keep the background subtle.


I put it all together using Modge Podge and then trimmed the matte board down to fit.


Next I moved onto the background of my tag.  I cover the whole tag with paper from the Cosmo Cricket Creative Girl Mini Deck included in the Jan kit.  I toned it down a bit with Picket Fence Distress Stain.  I created a panel using two of the wooden charms.  To keep the design cohesive, I covered them with white embossing powder too.  I also backed them with more of the Cosmo Cricket Creative Girl paper.


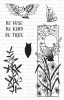
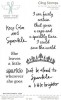
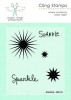
I embellished the tag using the adhesive backed Pearls from the Aug Nesting Components kit, rose ribbon and the fireworks bursts from the Sparkle stamp set.  The sentiment I used is on the With Some Sparkle stamp set.


Another little touch I added was some jewelry wire.  I used it to connect the wooden charms together.  To finish it off, I added some ribbon on the top and one of the Cosmo Cricket canvas brads.  I toned it down with more of the Distress Stain.


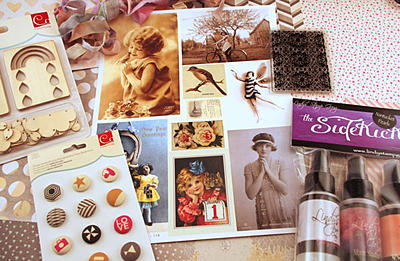
This is such a beautiful kit and it worked perfectly with this month's color challenge.  I highly recommend it!  You can view all of the details and purchase your kit HERE.  Well friends, it's time to send you off to the next stop in the hop.  Up next is PWP Mama Bird herself, Carrie!!

***Here is the complete line up just in case you get lost along the way***


Thank you so much for joining me today, enjoy the rest of the hop

&

Let Your Creativity Take Flight!!


Friday, September 6, 2013

PWP Sept Blog Hop!

WELCOME to the Paper Wing Production's Design Team Autumn themed Blog Hop & Giveaway!  If you've arrived here from Irit's Blog, then you're in the right place.  If you’re just stopping by for a visit, please CLICK HERE to start from the beginning.


This month we’re sharing gorgeous autumn themed projects full of warm rich colors.  So get comfortable and prepare to be inspired!!  This month’s main prize is a gift certificate to the New Paper Wings Production’s online store.  


 For a chance to win all you need to do is:
  1. be a follower of the Paper Wings Productions blog
  2. visit each of the participating designer's blogs and leave a comment
  3. come back and leave us a comment telling us you completed the hop.
To increase your chances of winning: like our Facebook page and/or invite your friends to the hop.  Be sure to leave a separate comment for each of your additional entries. 
.  The winner will be announced on Tuesday, Sept 9th, 2013 on the Paper Wings Productions blog.

I just love autumn because of all the warm rich colors. Fall and Halloween are also my absolute favorite seasons/holidays to create for so I was really looking forward to this hop. I enjoy finding hidden treasures at thrift shops, flea markets, garage and estate sales and lately I have found a ton of things to work with like the base of this month's project.


This is the base before I started to alter it.  I knew this would make a gorgeous shrine :D


I covered the base with gesso and added a scrap piece of chicken wire.  At this point I decided it would be easier to use spray primer so I took it outside and sprayed the whole thing.


I painted the shrine with a light coat of Golden Fluid Acrylic in Burnt Umber then sprayed it with Lindy's Stamp Gang in Burt Umber Moon Shadow Mist and Glory of the Seas Gold Starburst.


The image I used is from the clipart sheet in Sept Nesting Components kit and I added a little crown from the new Crowns stamp set. I created a chipboard frame using the Build A Shine set. I stamped the Dragonfly Fairy twice on book text and the wings out to create flowers. I attached the wings to wooden dowels so they would stand easily.


I used the Everyone Needs stamp set for my sentiment and attached it directly to the metal frame.


This sentiment is included in the new Dragonfly Fairy stamp set and the beautiful bronze sunflower is one of my flea market finds.


I tucked in a copper embossed leaf from the Leaf Cling Stamp set behind the artificial flowers.


I hope I've inspired you to get creative with this beautiful assortment of Paper Wings Productions products!! Stop by the online store to see what treasure you can find!! Make sure to head on over to Shay's Blog Next!!

***Here is the complete line up just in case you get lost along the way***

Amber Rasmuss - www.sew-ink.blogspot.com
Cathi O’Neill - www.celticknotted.blogspot.com
Erica Rose Thompson - http://ericarosecreates.blogspot.com

Paper Wings Productions Blog “The Aviary"­ - http://paper-wings-productions.blogspot.com/

THANK YOU SO MUCH FOR JOINING US TODAY!

&

Let Your Creativity Take Flight!

Monday, September 2, 2013

Upcycled Altered Art - Sept PWP Nesting Components kit

Happy Monday!  I hope you all are enjoying a wonderful start to your week.  Paper Wings Productions just released their new autumn themed Sept Nesting Components kit!  If you missed the release, you can see it HERE.  Dana Tatar shared a gorgeous fall banner.  

The new kit contains the beautiful rich colors of fall along with the Owl Panel stamp set.


So I was inspired to create an altered heart using upcycled materials from my hoard stash.


This beautiful piece started it's life as a chocolate Valentines Day box, a dresser handle and brown paper bag.  


I'd been saving this box for two years!  I always feel so great and less like a hoarder when I can use something that I've been saving for so long, lol.  I also used a recycled brown paper bag.


I cut the paper bag into strips and adhered to the box with Modge Podge.


After I covered the whole box, I applied a thin layer of gesso.  The gesso prevents the inks from seeping into the brown paper bag.


To create depth and texture, follow these steps:
1. Add a heart shaped layer of Lindy's Stamp Gang Fusible Webbing
2. Spray Lindy's Stamp Gang inks in the colors of your choice.  I used Tawny Turquoise, Burnt Umber, Cocklebells Coral, Glory of the Seas Gold and Opal Sea Oats
3. Sprinkle embossing powder over the fusible webbing.  I used Lindy's Golden Pumpkin Blush and the coarse black embossing powder from the kit plus Lindy's Desert Moon Turquoise from my stash.
4.  Heat with your gun to melt/set embossing powder.  The heat will also melt the fusible webbing creating folds and additional texture in your background.


I stamped the flowers from the Owl Panel onto the background and on white chipboard.  I fussy cut and added the floral sprays to the inside using foam dots.


The image I used is from the clipart included in the Sept kit.  I also stamped the owl onto a leaf and used the sentiment from the Owl Panel stamp set.


I embellished the heart using the Prima floral sprays and leaves included in the kit.  I also used a flower, artificial floral sprays and jewelry findings from my stash.


To finish off my piece, I used an old drawer handle that I secured with twine, cream colored fabric and the hand dyed ribbon from the kit.

For a complete list of products included in this month's kit, visit the Paper Wings Productions online store.  Thank you so much for stopping by and have a beautiful day!!!


Related Posts Plugin for WordPress, Blogger...