Showing posts with label clipart. Show all posts

Friday, June 6, 2014

Paper Wings Production Jun Blog Hop & Giveaway: Blue

WELCOME to Paper Wing Productions June Blog Hop & Giveaway! If you've arrived here from Katie's bloh, then you're in the right place.  If you’re just stopping by for a visit, please CLICK HERE to start from the beginning.


This month we're back to colors.  So get ready to be dazzled by beautiful BLUE. Now no hop would be complete without a little blog candy and this month we are changing things up.  Take a look at is this month's prize pack!!


This generous prize package contains:
Mix & Match Essential Tool Kit
Paper Crafter Crayons- Reds
Paper Crafter Crayons- Neutrals
Aquarelle Watercolor Pencils- Blues
Aquarelle Watercolor Pencils- Greens
Textural Accent Sampler
Retail value over $65!!!


Make sure to complete the entire hop for a chance to win this awesome prize pack from our sponsor: Faber-Castell!

For a chance to win all you need to do is:

  • be a follower of the Paper Wings Productions blog
  • visit each of the participating designer's blogs and leave a comment
  • come back and leave us a comment on the PWP blog telling us you completed the hop.
To increase your chances of winning:  like the Paper Wings Productions Facebook page and/or invite your friends to the hop.  Be sure to leave a separate comment for each of your additional entries. 

 We will announce the winner here Tuesday, June 10th, 2014.


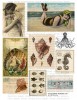
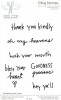
Hello everyone, thank you for stopping by!!  Today I have a really fun summer inspired mixed media piece to share with you.  This time of year I have the beach on my brain so I pulled out the Summer and By the Sea clipart sheets.


I'm using a chipboard banner covered with Cosmo Cricket paper from the Creative Girl Nesting Components kit.


Next I added birds using stencils the Crafter's Workshop stencil included in the For the Birds Nesting Component kit.


I used gesso with the stencil so it would resist when I sprayed the background. 


Once the ink was dry, I embossed with the beautiful Writing stamp.


Once the background was done it was time to start layering.  I added more Creative Girl papers and clip art.


I added K&Company diecuts and jewelry bits from my stash.


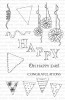
The sentiment is from the Happy Day stamp set.


Finishing touches include glitter embossed Renaissance Blue Fern chipboard (currently on sale for $3.15 in the PWP online store), Ric Rac and rubons.   Okay it's time to send back to The Aviary!

***Here is the complete line up just in case you get lost along the way***


Paper Wings Productions Blog “The Aviary­ - http://paper-wings-productions.blogspot.com/

THANK YOU SO MUCH FOR JOINING US TODAY!!
&
Let Your Creativity Take Flight!
Friday, May 2, 2014

Paper Wings Productions Friendship Blog Hop & Giveaway

WELCOME to Paper Wing Productions & Nani ke Ola Friendship Blog Hop & Giveaway! If you've arrived here from Katie's blog, then you're in the right place.  If you’re just stopping by for a visit, please CLICK HERE to start from the beginning.


This month we're excited to have the Nani ke Ola design team joining us to celebrate "Friendship".  So get ready for double the inspiration and giveaways.  That's right, there are two prizes for this month's hop.  The first is a $25.00 gift certificate to the Paper Wings Productions online store and the second is a generous prize package from Nani ke Ola.  Here are all the giveaway details:


The main prize is a $25.00 gift certificate to the Paper Wings Productions online store.

For a chance to win all you need to do is:
  • be a follower of the Paper Wings Productions blog
  • visit each of the participating designer's blogs and leave a comment
  • come back and leave us a comment on the PWP blog telling us you completed the hop.
To increase your chances of winning: like our Facebook page and/or invite your friends to the hop.  Be sure to leave a separate comment for each of your additional entries. The winner will be announced on Tuesday, May 6th, 2014 on the Paper Wings Productions blog.

Bonus Prize Sponsered by Nani ke Ola


7 Dots Studio Collection - One collection of your choice.  Chose from the following: Nature Walk, Illumination or Cold Country (International winners may have to pay an extra shipping fee)

For a chance to win all you need to do is:
  • be a follower of the Nani ke Ola blog
  • visit each of the participating designer's blogs and leave a comment    
                                    

Hi everyone, thank you so much for stopping by!!  Today I'm working with the gorgeous 7 Dots Studio Nature Walk Collection that was generously supplied by our guest Nani ke Ola.  I'm also using these beautiful Paper Wings Productions stamp sets: Writing Backgrounds, Vintage Lace, Fringe Lace, Sunburst Pattern, Hanging Stars and Perfect Alphabet.


I'm using a 12x12 black matte board for my background.  I wanted to make sure I had a strong background for my wet mediums.  The beautiful weathered wood 7 Dots Studio paper is called Musical Blooms.  I trimmed it down to 10.5" to allow the a black border to show.  Next I added texture using a Heidi Swap stencil and mask set with molding paste.


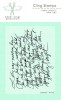
Once the molding paste began to set, I imprinted the butterfly with the Writing Backgrounds Script stamp.


After that I spritz the butterfly with black Tattered Angels spray ink and outlined it with a white Signo pen.  Later on I decided that the white edges need to be toned down so I went over them with a grey marker.


Using the butterfly mask included in the Heidi Swapp stencil set, I began creating a stamped layer.  This is the Vintage Lace stamp.


I added more white paint splatters to balance out the splatters printed on the 7 Dots patterned paper.


Layering time!  I layered a doily from my stash, Nature Walk tags and stickers.  I also added a tag that I created using the Fringe Lace and Sunburst Pattern stamps.


My focal image is from the Vintage Cuties Clip Art Sheet.


I created my sentiment using both the Perfect Alphabet and Hanging Stars stamp set.


Finally to soften things up a bit I added beautiful ribbon and trim.


Okay, it's time to send you off to the final stop of the hop: The Aviary

***Here is the complete line up just in case you get lost along the way***
Paper Wings Productions Blog “The Aviary­ - http://paper-wings-productions.blogspot.com/

THANK YOU SO MUCH FOR JOINING US TODAY!!

&

Let Your Creativity Take Flight!
Monday, September 2, 2013

Upcycled Altered Art - Sept PWP Nesting Components kit

Happy Monday!  I hope you all are enjoying a wonderful start to your week.  Paper Wings Productions just released their new autumn themed Sept Nesting Components kit!  If you missed the release, you can see it HERE.  Dana Tatar shared a gorgeous fall banner.  

The new kit contains the beautiful rich colors of fall along with the Owl Panel stamp set.


So I was inspired to create an altered heart using upcycled materials from my hoard stash.


This beautiful piece started it's life as a chocolate Valentines Day box, a dresser handle and brown paper bag.  


I'd been saving this box for two years!  I always feel so great and less like a hoarder when I can use something that I've been saving for so long, lol.  I also used a recycled brown paper bag.


I cut the paper bag into strips and adhered to the box with Modge Podge.


After I covered the whole box, I applied a thin layer of gesso.  The gesso prevents the inks from seeping into the brown paper bag.


To create depth and texture, follow these steps:
1. Add a heart shaped layer of Lindy's Stamp Gang Fusible Webbing
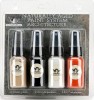
2. Spray Lindy's Stamp Gang inks in the colors of your choice.  I used Tawny Turquoise, Burnt Umber, Cocklebells Coral, Glory of the Seas Gold and Opal Sea Oats
3. Sprinkle embossing powder over the fusible webbing.  I used Lindy's Golden Pumpkin Blush and the coarse black embossing powder from the kit plus Lindy's Desert Moon Turquoise from my stash.
4.  Heat with your gun to melt/set embossing powder.  The heat will also melt the fusible webbing creating folds and additional texture in your background.


I stamped the flowers from the Owl Panel onto the background and on white chipboard.  I fussy cut and added the floral sprays to the inside using foam dots.


The image I used is from the clipart included in the Sept kit.  I also stamped the owl onto a leaf and used the sentiment from the Owl Panel stamp set.


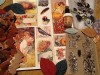
I embellished the heart using the Prima floral sprays and leaves included in the kit.  I also used a flower, artificial floral sprays and jewelry findings from my stash.


To finish off my piece, I used an old drawer handle that I secured with twine, cream colored fabric and the hand dyed ribbon from the kit.

For a complete list of products included in this month's kit, visit the Paper Wings Productions online store.  Thank you so much for stopping by and have a beautiful day!!!


Related Posts Plugin for WordPress, Blogger...